
Working with Pictures on MediaFire
MediaFire makes many things easy for you, including working with your pictures. With our image gallery, you can always go through all of your pictures in an eye-friendly size without having to download them first.
There is more than one way to create a gallery. The easiest one is to simply left click on the image file on your “My Files” page, and you will be immediately taken to an image gallery of all the pictures in that folder.
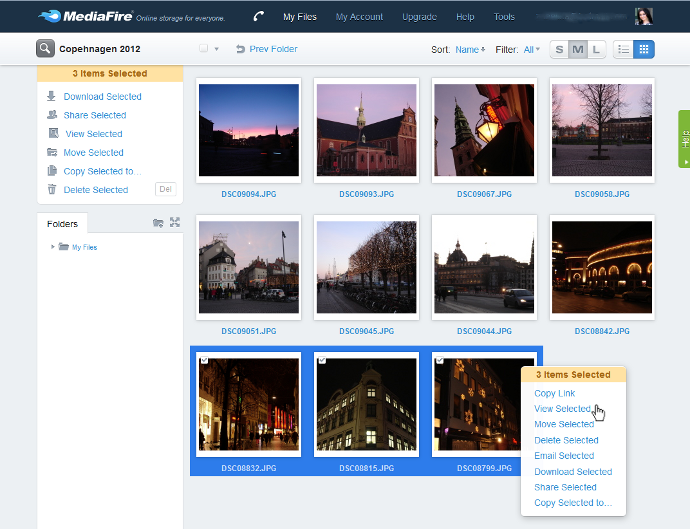
To create a gallery of a few specific images, just select the pictures you want to include in the gallery on your “My Files” page, then right click and select “View Selected”. The images of your choice will appear in the gallery in a new tab or a new window.


Once you’ve created a gallery, you will find 3 viewing modes on the top of the page (see below).

- Film Strip mode displays the image of your selection in a big size with all other images from that folder appearing on the right side as a film-strip. You can easily jump to other pictures from the same folder just by scrolling down with your mouse. You can also do that by clicking the arrows in the top right corner, or by using keyboard shortcuts (Up/Left key for a previous photo and Down/Right key for next photo).

- Single Image mode displays only one image per page, however you are still free to switch to other images by using the above mentioned keyboard shortcuts.

In both the Film Strip and Single Image modes it is possible to view images in 3 different sizes – Auto, Original and Full screen, – or zoom in and zoom out as much as you need.


You can also rotate pictures in the gallery by using the circular arrows to the left from the zooming options.

In Full Screen mode, you can navigate the folder images with the Up/Down/Left/Right keys, or the arrows displayed on both sides of the screen, and exit by simply pressing Esc or clicking the “X” in the top right corner.

- Gallery mode shows all of the pictures from the folder of your selection as thumbnails (you can choose between a small, medium, or a large size). From there you can left click of any image and it will be opened in the default Film Strip mode.

Your images will be opened in Film Strip mode by default, but you can switch to either of the other 2 modes in the upper right corner of the image gallery at any time (see first screenshot).
Apart from image-related functions, the gallery also gives you some basic file functionality. Just right click on the main image or any image from the folder in the film strip on the right side, and you will get the menu that offers you to download, share, rename, describe or delete the image. There are also large Share and Download buttons in the top right corner.

You can also work with multiple images in the gallery. Simply hold the Ctrl key on Windows and Linux, or the Command key on OSX and select every image that you click on. If you have lots of images to work with, it could be helpful to select the images you need using the Shift key: by holding it, you can select all the images below the image where you started up to the image that you next click on the right side of the Gallery in the Film Strip mode. And once you’ve selected all the images you needed, just right click on either of them to download them, share them or delete them (downloading multiple files is available for users with Personal, Professional and Business Accounts).

And finally, you get 2 functions for the entire folder of your choice in the image gallery: to share it or to download it as one file (this last feature is available for Personal, Professional and Business accounts). You’ll find those two options in the bottom right corner in the Film Strip mode, or the top right corner in Gallery mode.
We hope you enjoy working with pictures using MediaFire image gallery just like everything else on MediaFire! Don’t forget to tell us what you think and share this blog post with your friends.
Veronica and The MediaFire Team
awesome