
How to Organize Your Files
Now that you’ve got uploading all figured out, we’re going to tackle organizing those files by creating folders and moving stuff around.
Organizing files in MediaFire works just like it does on your computer.
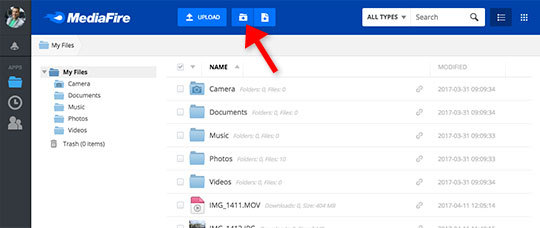
Step 1: Create a Folder
Click the “Create Folders” icon in the header bar to create a new folder.
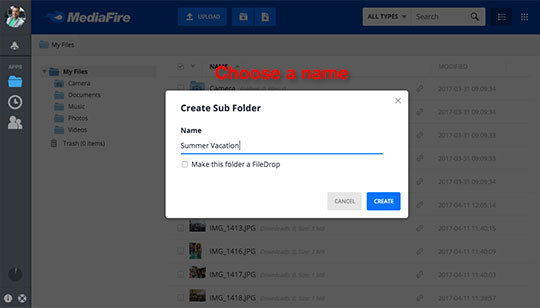
Next, choose a name for your folder. (Leave the “FileDrop” box unchecked. We’ll talk about that nifty feature in a later tip.)
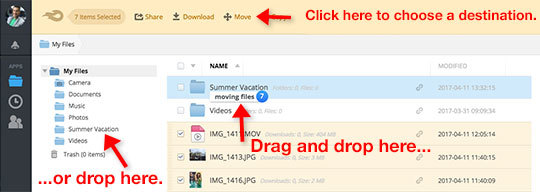
Step 2: Move Files into a Folder
There are a couple different ways to move files into a folder. You can click once on the filename to highlight it and click “Move” on the header bar (or right-click on a filename and choose “Move” from the menu), and then click on the folder you want to put the files in.
Or you can drag each file directly over the folder name to drop it in there.
And, of course, you can do the same with folders as you do with files. Feel free to move them around, create new ones, or delete the default ones that we generated in your new account.
Okay, that’s it for folders! Easy peasy.
Let us know if you need help with anything! Our customer support team would love to say hi. Submit a ticket for the fastest response.
Happy organizing!